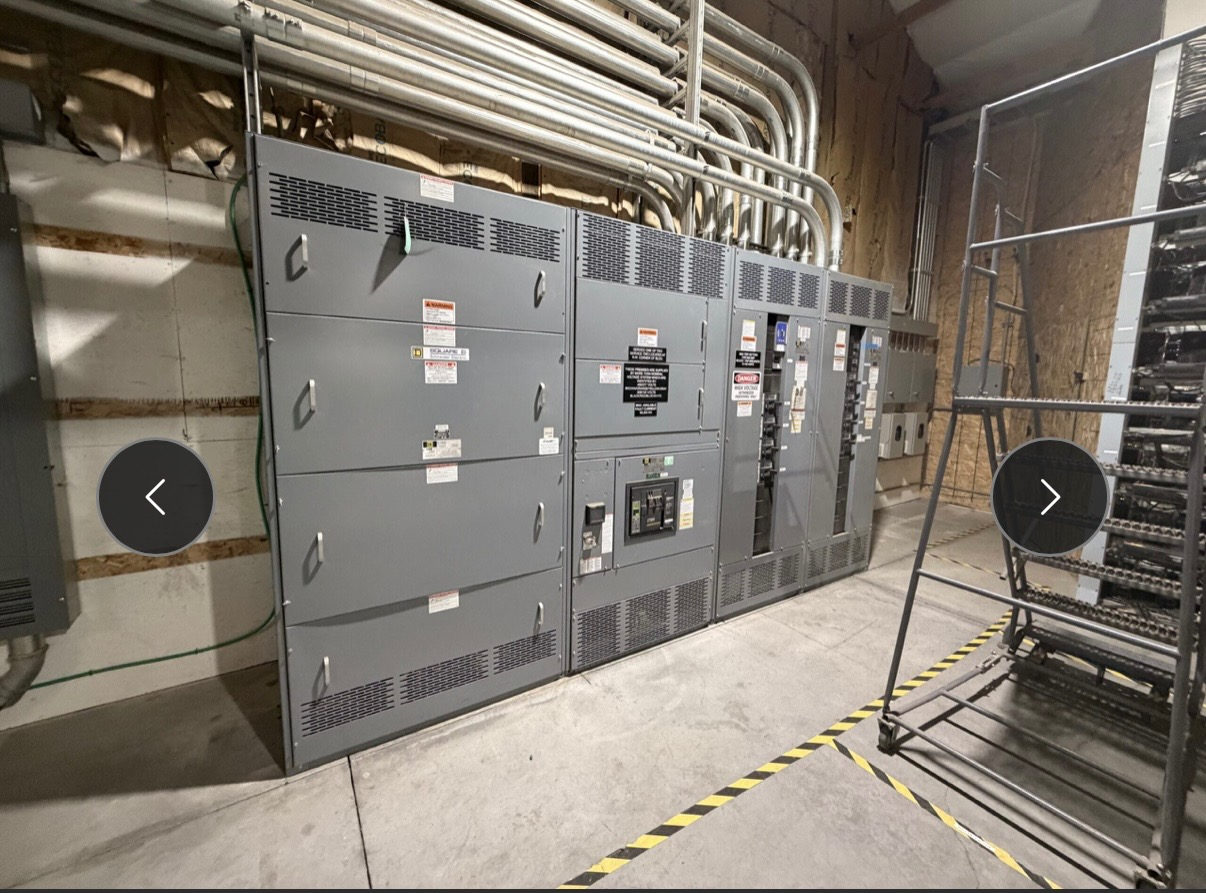
Start with the equipment and the room
How much space does switchgear need? There is no single footprint or clearance that suits every installation. Dimensions depend on equipment type, system design, ratings, component arrangement, and the manufacturer’s construction. For a new switchgear project, begin with the one-line diagram, project specifications, and the intended equipment function, then develop the layout around the proposed assembly and its operating requirements.
Separate the equipment footprint from the space needed to operate, inspect, and maintain it. A lineup may also require room for doors, removable panels, cable terminations, ventilation, and future access. The applicable working clearances depend on the equipment and installation conditions; they should be established from governing requirements and reviewed by qualified electrical professionals, not estimated from a generic rule of thumb.
Identify the clearances that govern the layout
Working space is not simply an aisle added in front of a cabinet. The required arrangement can depend on voltage, exposed energized parts, equipment orientation, nearby walls or other equipment, and the conditions of access. Applicable codes, standards, project requirements, and authority review determine what clearances apply. Confirm the required space at the front, rear, and sides rather than assuming every assembly needs the same access on every face.
Also account for the actual operating and maintenance tasks anticipated for the installation. Door swing, handle operation, inspection access, and the path for removing or replacing components can affect usable room dimensions. Do not treat a drawing’s equipment outline as proof that working space is adequate. Have the project’s electrical design professionals verify the layout against the selected equipment and applicable requirements before the room plan is finalized.
Gather the site inputs before setting dimensions
Useful planning inputs include available room width and height, structural obstructions, floor openings, access doors, and the route from receiving point to final location. Confirm ceiling height and overhead services, as well as the intended entry points for incoming and outgoing conductors. Cable type, routing, bend space, termination direction, and conduit or busway interfaces can influence lineup placement and depth. Floor loading, anchorage, environmental conditions, and ventilation requirements also need project-specific review.
Provide current architectural and electrical drawings, the equipment schedule, system diagrams, and known site constraints when requesting a design. Identify whether the assembly is against a wall, located in a dedicated electrical room, or arranged with access on multiple sides. These conditions can affect both the physical dimensions and the required clearances. Resolve uncertain measurements through the project team before equipment drawings are treated as final.
Coordinate interfaces and future access
Switchgear occupies space within a connected system, so its layout must work with upstream and downstream equipment, protective devices, conductors, grounding, and control wiring. Confirm connection locations and directions with the project design, including any transformer, generator, utility, or distribution interfaces that apply. Such interfaces are project-specific; do not assume a particular connection method or utility acceptance without verification. Allow the responsible designers to check access to adjacent equipment and ensure the planned arrangement does not obstruct required working space.
Consider how technicians will reach components and how the assembly can be handled during delivery and placement. Shipping sections, lifting arrangements, turning space, thresholds, and the building route may impose constraints distinct from the installed footprint. Where later expansion or replacement is a project objective, discuss reserved space and connection strategy early. Future capacity or expansion should not be presumed available unless it is explicitly designed and confirmed.
Verify drawings, ratings, and applicable standards
Space planning and electrical selection should proceed together. The required voltage, continuous current, fault-duty conditions, protective functions, and environmental conditions may affect the assembly’s configuration and dimensions. Each value must be selected for the application and verified by qualified electrical professionals. Applicable standards depend on equipment design and project use. UL 891 applies to suitable switchboard assemblies where applicable; it is not a blanket listing for all switchgear or for medium- and high-voltage equipment.
Review the manufacturer’s proposed dimensions and arrangement drawings against the room plan, cable interfaces, and working-clearance requirements. Resolve discrepancies before fabrication, and identify which drawings are preliminary versus approved for construction. Coordination can include design review and project-specific testing or inspection requirements, but the scope and acceptance criteria must be established for the particular project. Ratings, clearances, and compliance should be confirmed rather than inferred from a product name or a typical layout.
Make the next space-planning decision
To move a new switchgear request forward, assemble the one-line diagram, equipment schedule, project specifications, room dimensions, access route, and interface details. Ask the design team to identify the governing clearance requirements and the dimensions that remain provisional. Then request a proposed equipment arrangement for review against the room and installation constraints. This process helps expose conflicts—such as insufficient door access, blocked cable entry, or an impractical delivery path—before they become costly drawing changes.
A US-built manufacturer using all-American components can develop custom assemblies to specification and ship nationwide; lead time depends on project scope and design review. For Austin and Central Texas projects, provide site and delivery constraints for coordination without assuming a local facility or installation service. The practical answer to how much space is needed is the verified layout for the selected assembly, its interfaces, and the applicable working clearances—not a universal dimension.
Project specification checklist
Use this checklist to organize the details for a project-specific review. Final ratings, applicable standards and equipment selections depend on the approved design.
| Item | What to confirm |
|---|---|
| Equipment footprint | Confirm proposed overall width, height, depth, section arrangement, and any project-specific options. |
| Working clearances | Have qualified professionals verify required access around the equipment under applicable project requirements. |
| Cable and system interfaces | Confirm termination locations, conductor routing, upstream and downstream connections, and entry direction. |
| Room and access route | Check obstructions, ceiling height, doors, turning space, receiving path, and placement constraints. |
| Ratings and standards | Verify application-specific electrical ratings and which standards or listings apply to the assembly. |